This weekend one of the guys on a forum I frequent suggest we do a Challenge paint and we agreed on Fall Harvest as the theme. Some of the folks on forum do periodic challenges where 5 or six people usually agree to the theme and time frame. When the paintings are finished we all pat each other on the back and say how grand the work is. The forum is populated with people different levels of accomplishment from the very accomplished to to very beginner. It's kind of fun and eases the pressure of production.
The forum is at http://www.drawmixpaint.com where Mark Carder attempts to teach people who can't draw a lick to paint. It's a disciplined work flow or process that seems to work. It helped me get back in painting form after a six year layoff.
I thought I'd follow my process from sketch to finish sharing my thoughts and feelings as I go along.
Fall Harvest
This is just an excuse for me to buy some Cortland apples and make a pie. I shouldn't be eating pie. These simple line sketches show my origin thinking on the project. We have an old copper pale that I've wanted to use in a still like for a while. Thats where I started. As you see I like to use diagonals and squares and golden ratios in my thinking.
Original doodles from my sketchbook
I use a Canon 5D Mark II connected to my MacBookPro with a USB cable. The Canon Camera Window app allows me to see the set up in a live view on the laptop. I have full control over the camera's features like exposure, fStop, and ISO. I can then shoot the images right from the computer.
This image is the first take with the camera.
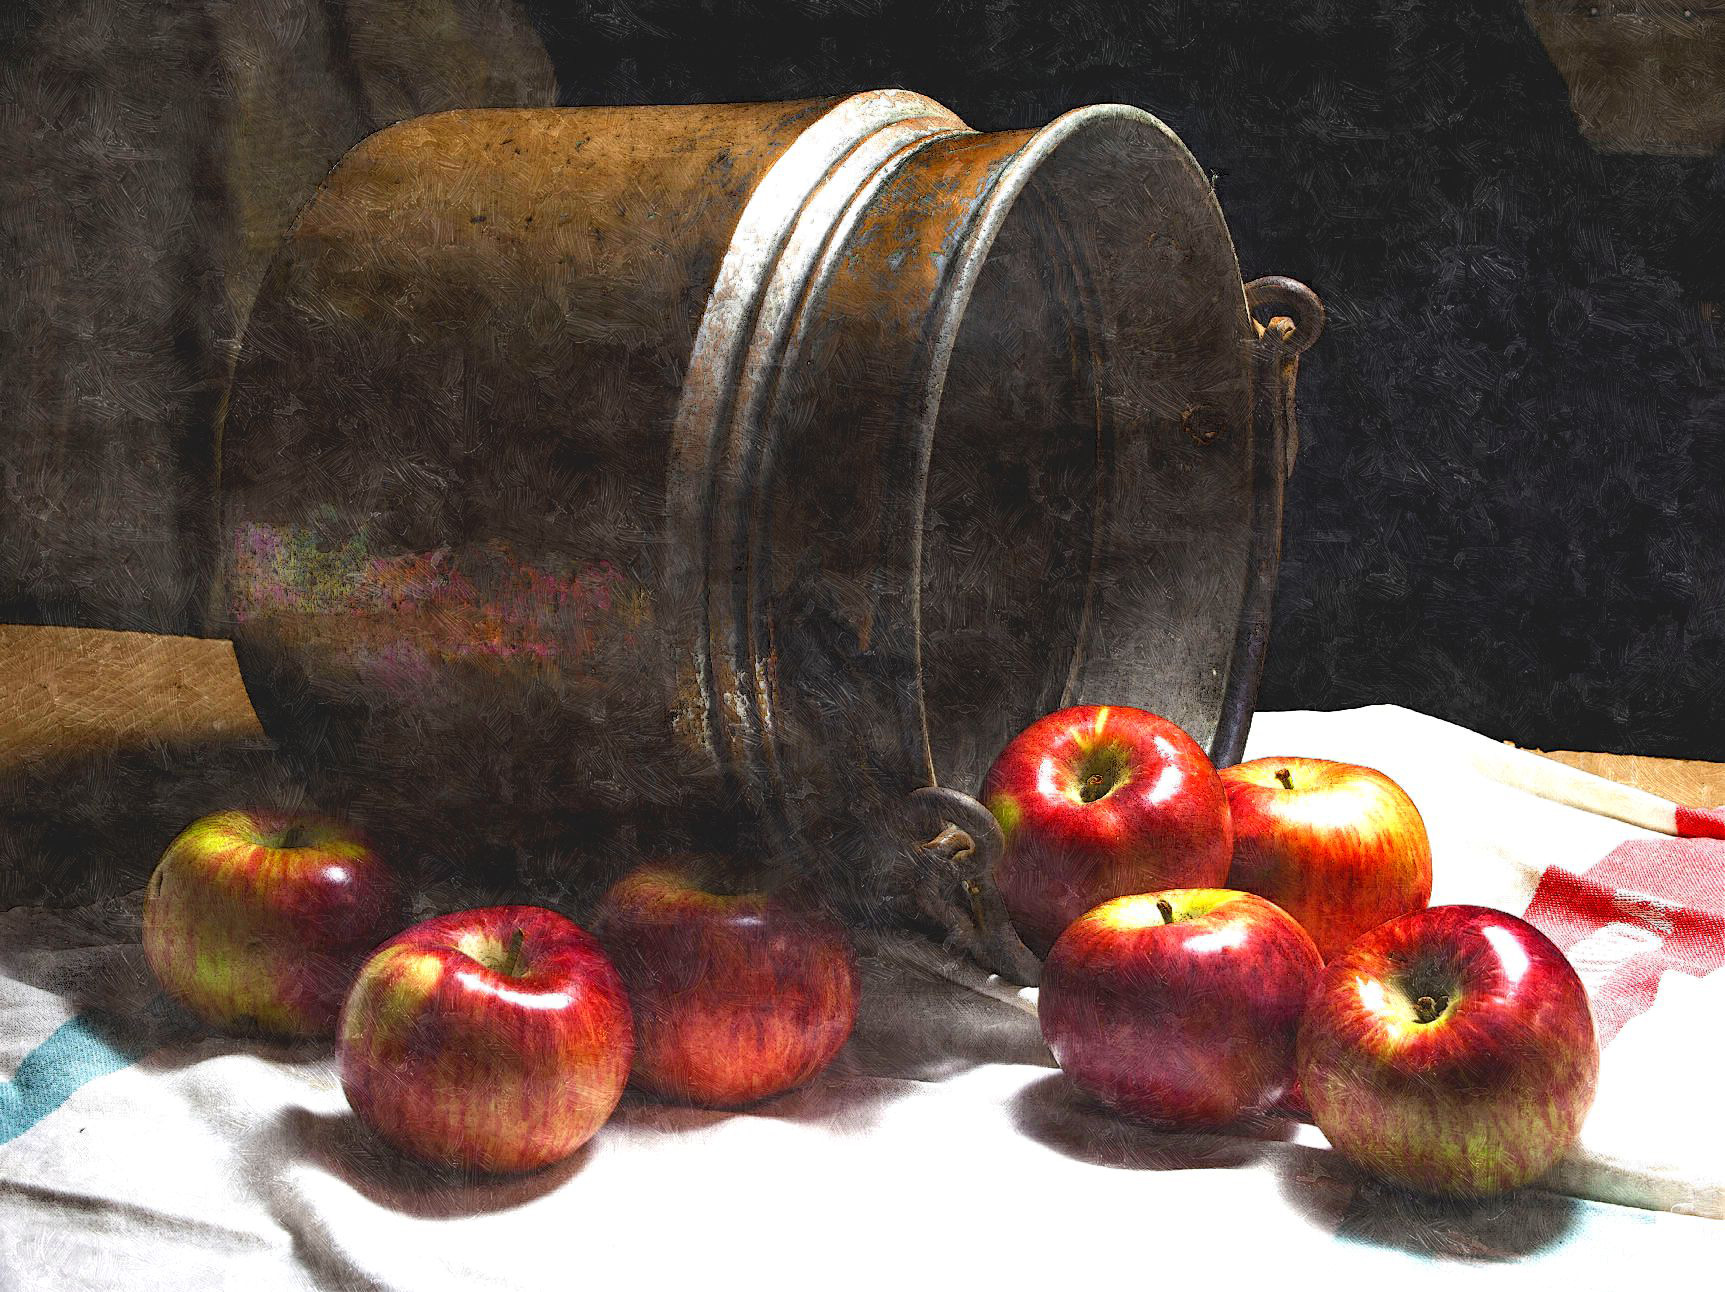
Original set-up. I like the relationship of the apples to the pail.
This set is okay. I almost decided to use this but kept pushing. I didn't like the left side. And it wouldn't fit real well in the 24 x 16 canvas I have on hand. So I added another apple a cup and some pheasant tail feathers.
setup...... It looks chaotic but it isn't. The lighting is simple. A 5000k pigtail florescent. Tracing paper is a good diffuser. The cardboard will look like wood when painted.

Still life set-up. Light is a desk lamp with a tracing paper diffuser. It's all set on a workbench that serves a million functions in my limited space.

The finished shot
I shoot photos as RAW format so that I can control exposure and the like in Photoshop.
This image is a composite HDR. 2 exposures combined. I then process it with a few filters to add some squint to it. It's now softened the colors are a little more real yet translated. The left side is now resolved. The feathers break up the straight line of the table.The apple in full shadow and tarnished silver goblet. All the edges are apparent where to loose and where to define.
Usually this is not my type of image but I like it. The reflections lost edges and light & dark. Below is a image overlaid with compositional guides. 24 x 16 inch proportion.

The finish with composition guides overlaid. I use these to transfer to canvas.

Sme of the key planning and interest points. The set-up was planned withe the 1 to 1.6 ratio in mind
The next step is to make a full size image for color matching and drawing 1 to one. the prints I have now a half size so scaling using the proportional divider set to 1 to would be easy but full size will be easier on the eyes. The drawing will be simply blocked in with only details elaborated where necessary. The ground will be the same tinted gesso mixed a few months ago. There should be enough left.
The real next step is really making a pie from these lovely apples. Off to make the crust.
Oh Boy Pie!
Well that it the pie is made all I have to do is eat it.. Later this week I start the painting hope.. Stay tuned for updated.
Update. Added Bell upper right.

May use added bell?????
With the addition of the bell several good painters have brought the cup into question. I made a version without the cup. The jury is deliberating

With no cup

6 value ranges
After making this abstracted value range image in Photoshop I decided that the cup works best by breaking up the curve of the bottom of the pail. Just waiting on a set of new paints that I'll be testing on this painting. Can't wait.